Hip Replacement Recovery: Turning a Major Surgery into a Life-Changing Comeback

Being told you need a Total Hip Replacement can be daunting. Questions flood in quickly: Will I ever walk again? How long will it take to get back in business? Will I ever be the same again?
The fears are valid. But here's the truth of the matter:
Hip replacements have a great record as far as surgical procedures are concerned. Research shows a 95% success rate in the short and long term. An overwhelming number of people get back to walking and daily activities without major complications. In other words, it can be your ticket to a painfree, productive life, especially when used in conjunction with an excellent physical rehab program.
This piece will address the key things you need to know when it comes to effective hip replacement recovery. We'll lay the foundation with a quick look at what a hip replacement is, what it looks like, and how it's done, before moving to the recovery process.
What's a Hip Replacement?
As the name suggests, this is when damaged bone and cartilage in the hip joint is replaced with prosthetic/artificial components. Let's take a quick look at how the hip joint is structured to lay the foundation for understanding how a replacement works.
Bony Structure
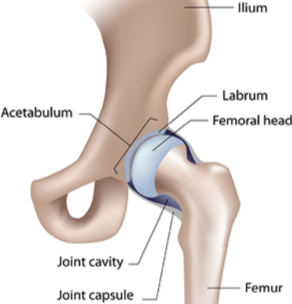
The hip joint is one of the most stable joints in the body. It's a ball and socket joint, composed of the head of the thighbone(aka Femur), and a rounded socket of the pelvic bone(Acetabulum). Both parts of the articulating surfaces are covered by a soft, thin lining called cartilage, which protects the bones from grinding on each other.
Muscles
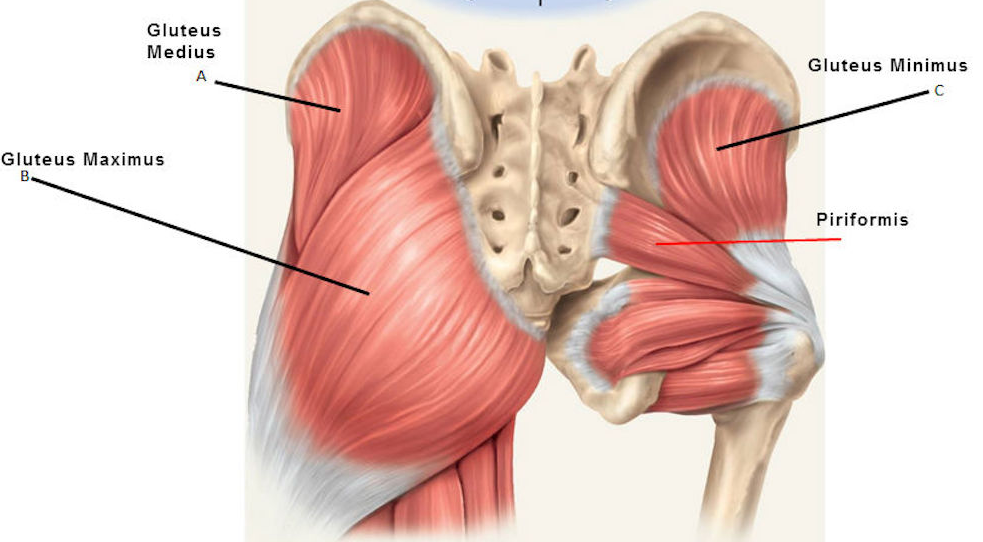
1. Gluteals(aka Glutes): A group of three muscles at the back and sides of the pelvis. The Gluteus Maximus represents the largest and most powerful of the three. It's mainly responsible for driving hip joint extension, which is key in keeping your hips extended whenever you're standing or walking. The other two muscles (Glute Medius and Minimus) help with stabilizing the pelvis and driving hip abduction(pulling the thigh bone outwards)
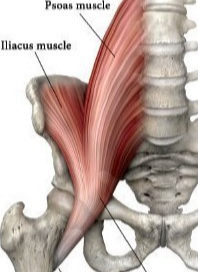
2. Illiopsoas: A powerful two-headed muscle that spans the inner parts of the pelvis, and front part of the hip joint. It's the main driver of flexion(moving the thighbone forward).
3. Adductors: A group of muscles located in the inner part of the thigh, responsible for pulling the thighbone inwards. The Adductor Magnus is the largest and most powerful player. In addition to adduction, these muscles turn/rotate the thighbone inwards.
4. External rotators: A group of deeper, smaller muscles that turn the thighbone outwards(External Rotation).
When Does a Hip Replacement Become Necessary?
Osteoarthritis: A condition which involves wearing away of joint cartilage over time, causing bone-bone friction. Advanced cases typically require total replacement for better long term outcomes. Osteoarthritis can be a slow process that's influenced by a variety of factors like ageing, or triggered by injuries like fractures around the hip joint.
Fractures: Fractures of the piece of bone connecting the head of the thighbone to its main body, known as neck of femur, often require surgery. The main reason is that these fractures are difficult to heal due to limited blood supply in the area, which leads to degeneration of the head of femur.
Developmental deformities: Sometimes, there may be structural abnormalities from birth or childhood, which can result in degeneration of key structures within the hip joint.
What Happens During Hip Replacement Surgery
Now let's take a look at the key surgical approaches for total hip replacement, and what the actual artificial components look like.
There are three basic components
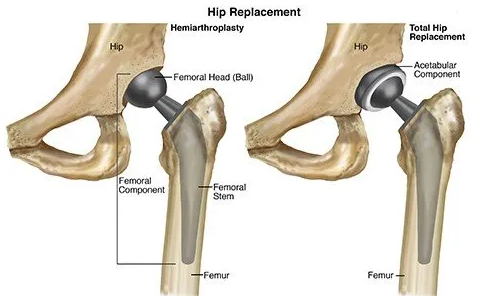
1. Bearing surfaces: This refers to the articulating surfaces at the joint. Basically, this is the artificial head and socket, made by similar or different materials. It may be metal-on-metal, ceramic-polythylene, metal-polythylene.
2. The stem(aka Femoral component): The longer piece of metal that's implanted into the thighbone.
3. Prosthesis fixation: This involves specialized bone cement used to secure artificial joint components to natural bone. However, this is not always needed. The use of cement is usually reserved for those with compromised bone integrity (i.e Osteoporosis), and those who need immediate stability.
Key Surgical Approaches for Hip Replacement
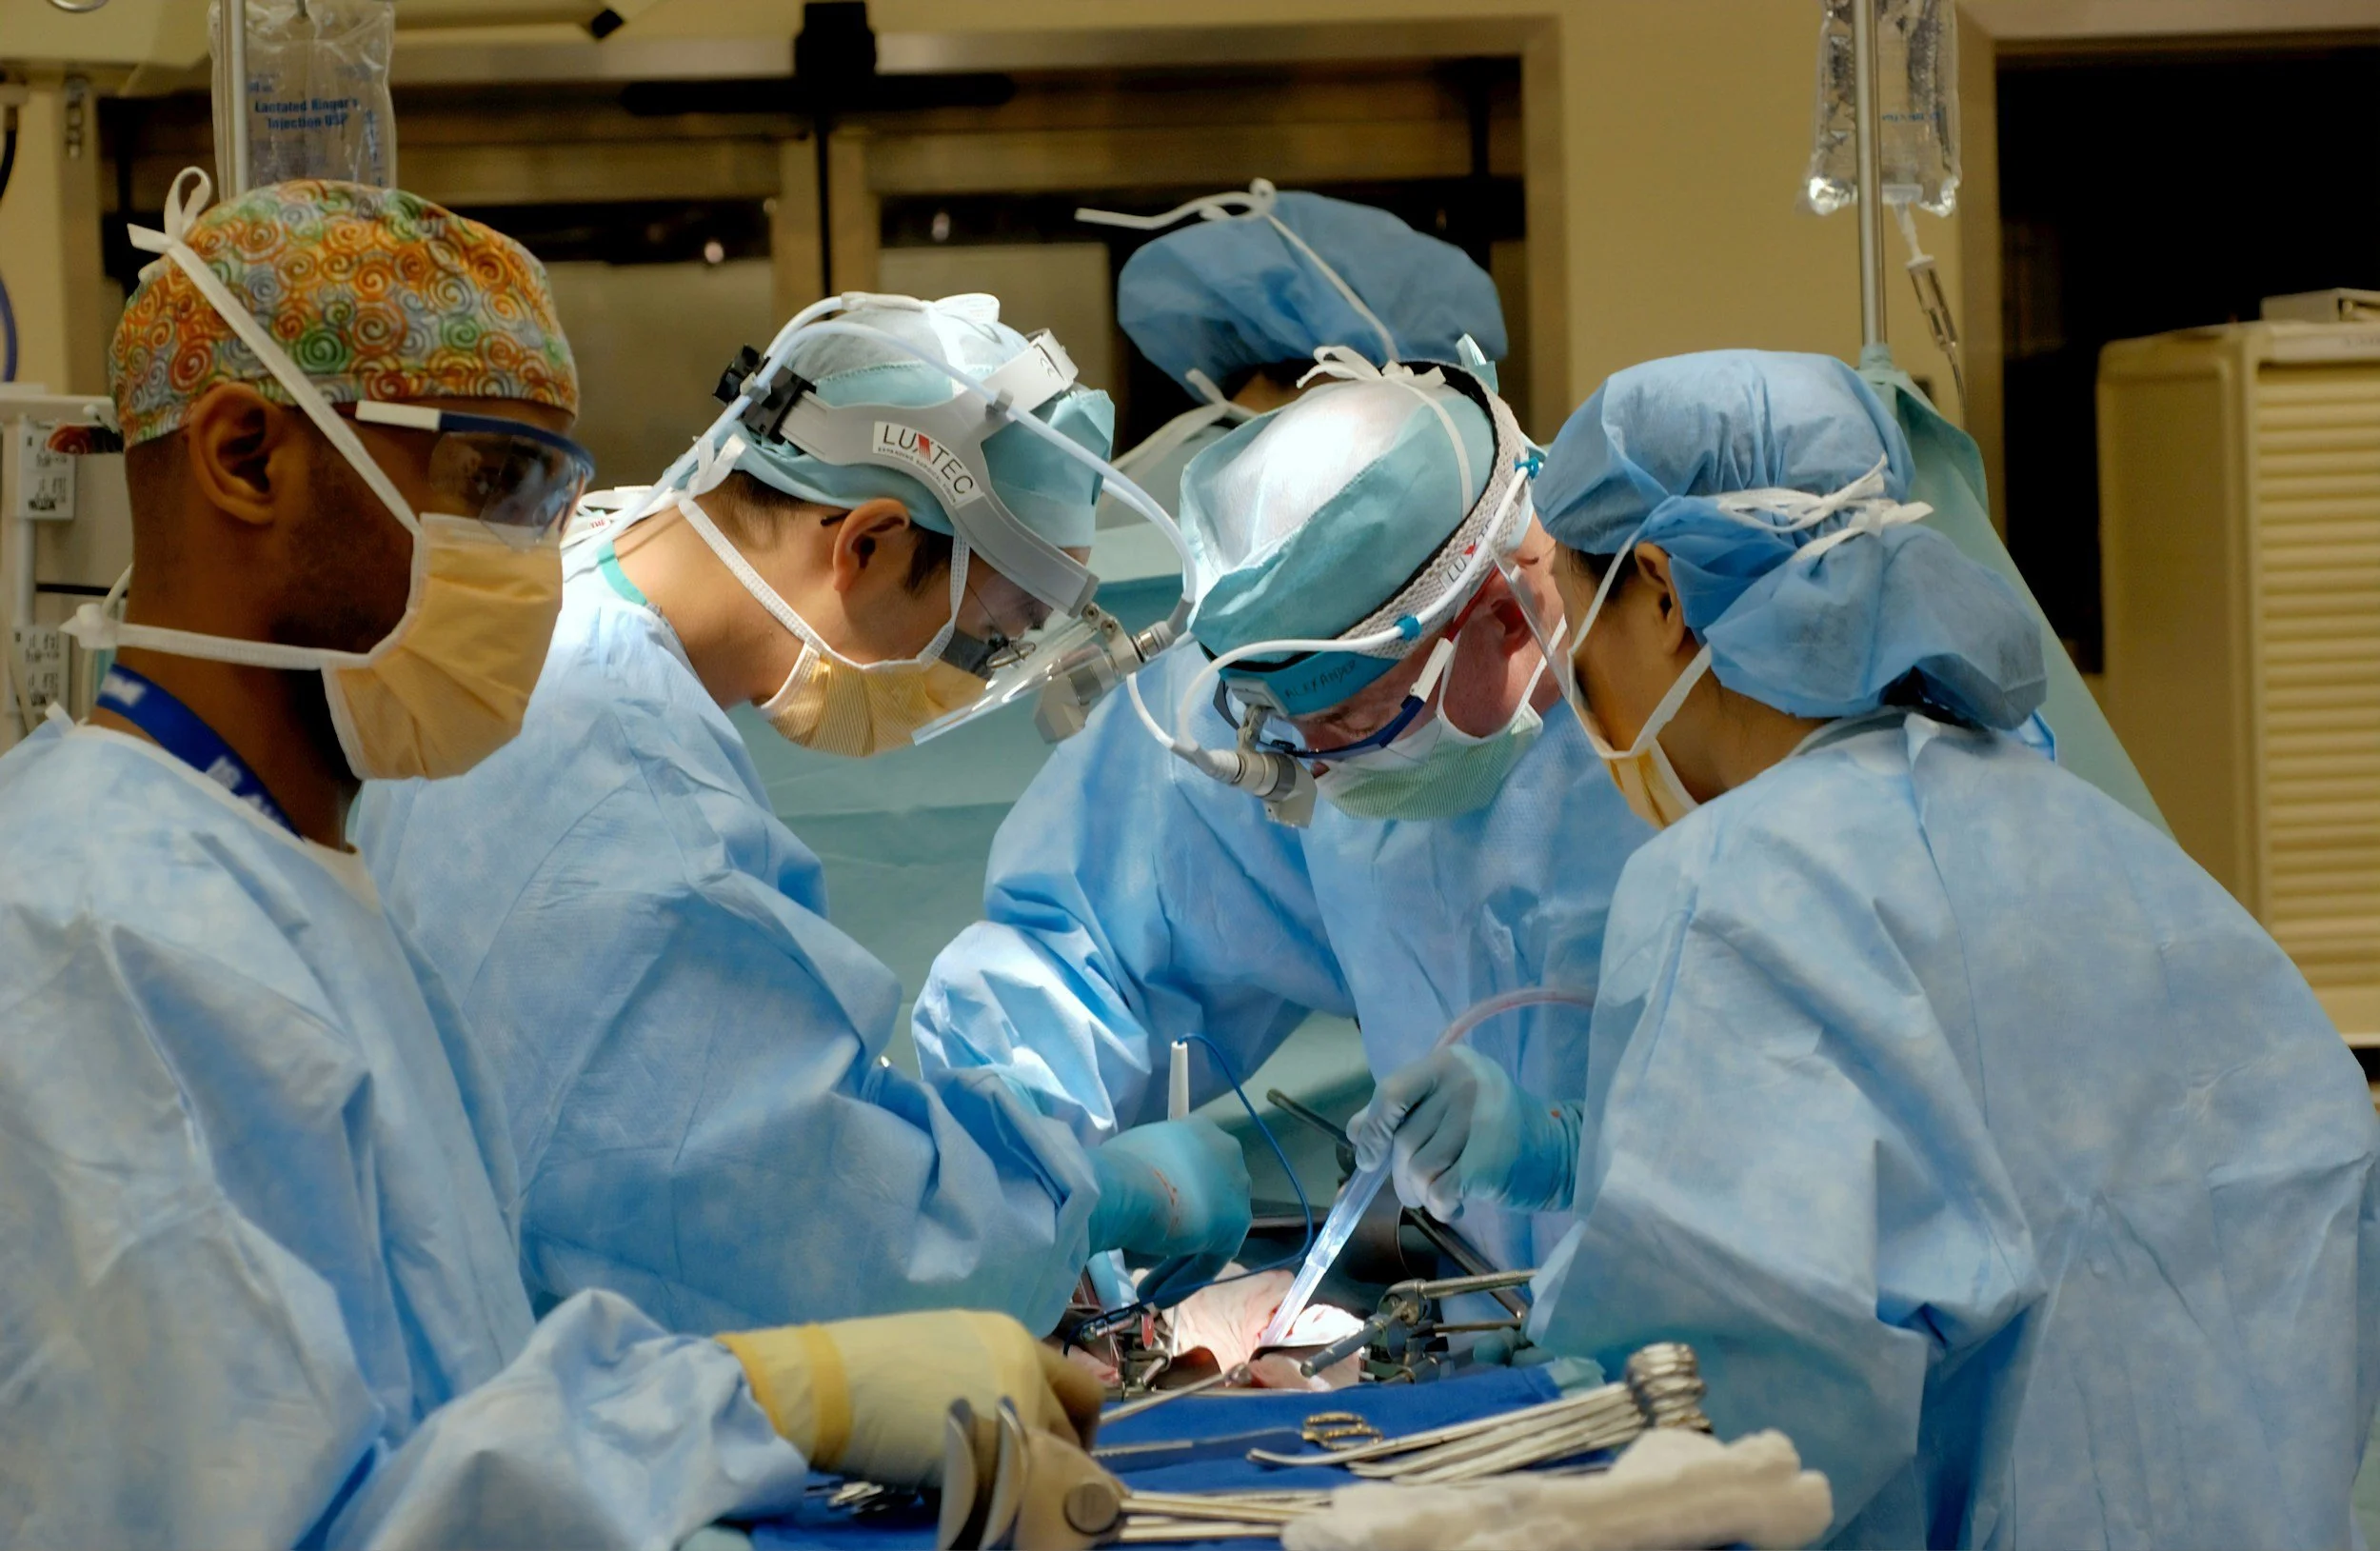
Posterior Approach(PA): This is the most popular choice among surgeons, mainly because it allows them to avoid interference with adductor muscles more effectively. The patient lies on the side, and the cut/incision is made along the side of the hip just behind the joint.
Direct Anterior(DA): This approaches the hip joint from the front. The patient typically lies on the back while the cut is made along the front part of the thigh. Potential advantages include lower risk of complications like joint dislocation and faster recovery post surgery.
Direct Lateral: This approach involves an incision made directly along the outside of the hip. It's considered a somewhat balanced option, something in between the posterior and anterior option.
Total Hip Replacement Recovery Journey
There are 4 key phases involved in the recovery journey post total hip replacement surgery:

Phase 1: Immediate post surgical phase(0-3 days)
This stage is about protecting the surgical area, promoting wound healing, and optimizing mobility. Key interventions include:
Passive modalities: Ice therapy, soft tissue mobilisation techniques.
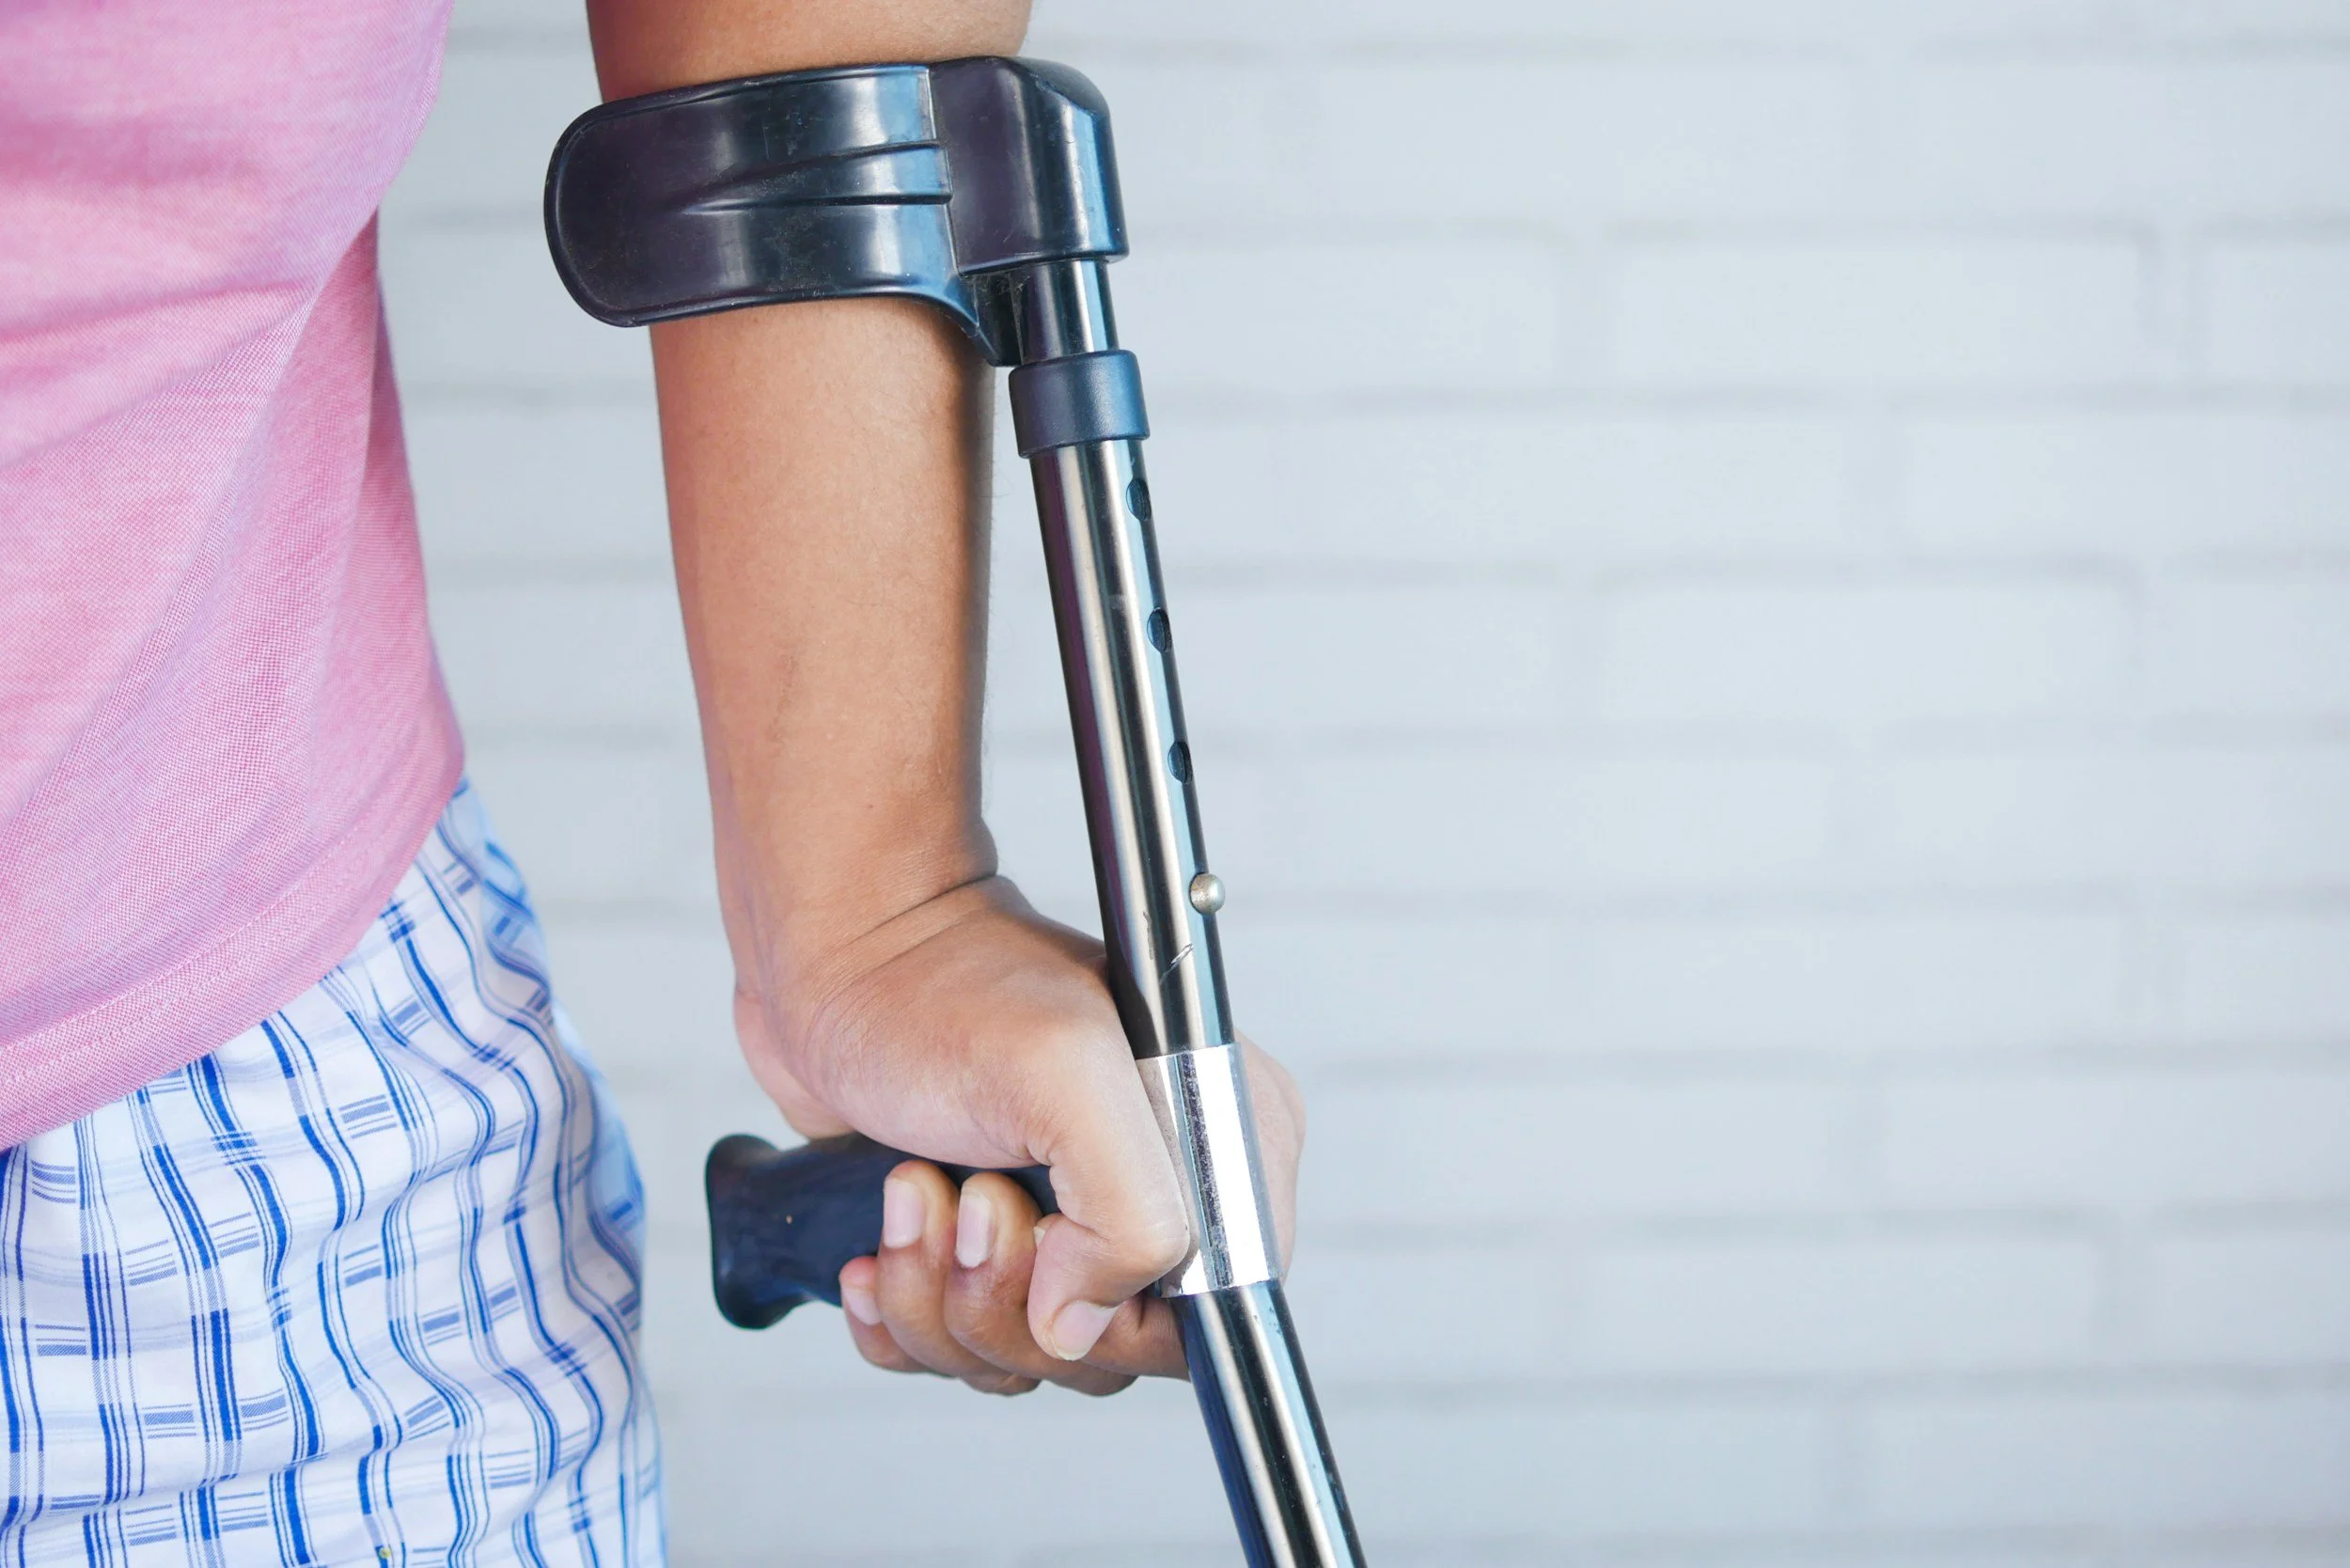
Exercise: Passive and active range of motion exercises, isometric exercises, gait training with assistive devices i.e walker and crutches.
Special precautions are taken into consideration with respect to the type of surgical procedure.
Phase 2: Motion and mobility (1-6 weeks)

This stage focuses on improving hip joint range of motion, enhancing muscle strength, and weaning from assistive devices. More challenging exercises are brought in to build on the interventions from stage 1:
Closed chain strength training exercises i.e sit-stand transitions, step ups, mini squats.
Balance training drills: weight shifting exercises.
Isometric exercises.
Phase 3: Strength and function
This phase emphasizes more advanced drills aimed at optimizing strength, balance, and overall functional performance:
Progressive strength training exercises: Squats, lunges, step ups, resisted side steps etc.
Balance drills.
Cardio: treadmill walking, elliptical bike training, stationery biking.
Phase 4: Return to activity
This is about taking you all the way to what you love to do in a safe manner. More advanced exercises specifically tailored to your daily needs and occupation are brought into the picture.
Higher resistance drills i.e weighted squats, lunges etc.
Endurance training: longer cardio sessions i.e treadmill, biking etc.
Sport/activity specific training.
Looking to get a personalized rehabilitation program? Hit the number on the top right corner and reach out to us.
Best exercises for long-term functional recovery
Once you're in phase 3 of the rehab program, you may be cleared for a general exercise routine to maintain or build strength and function in the affected hip. Here are some of the moves you can use to build flexibility and strength in your hip.
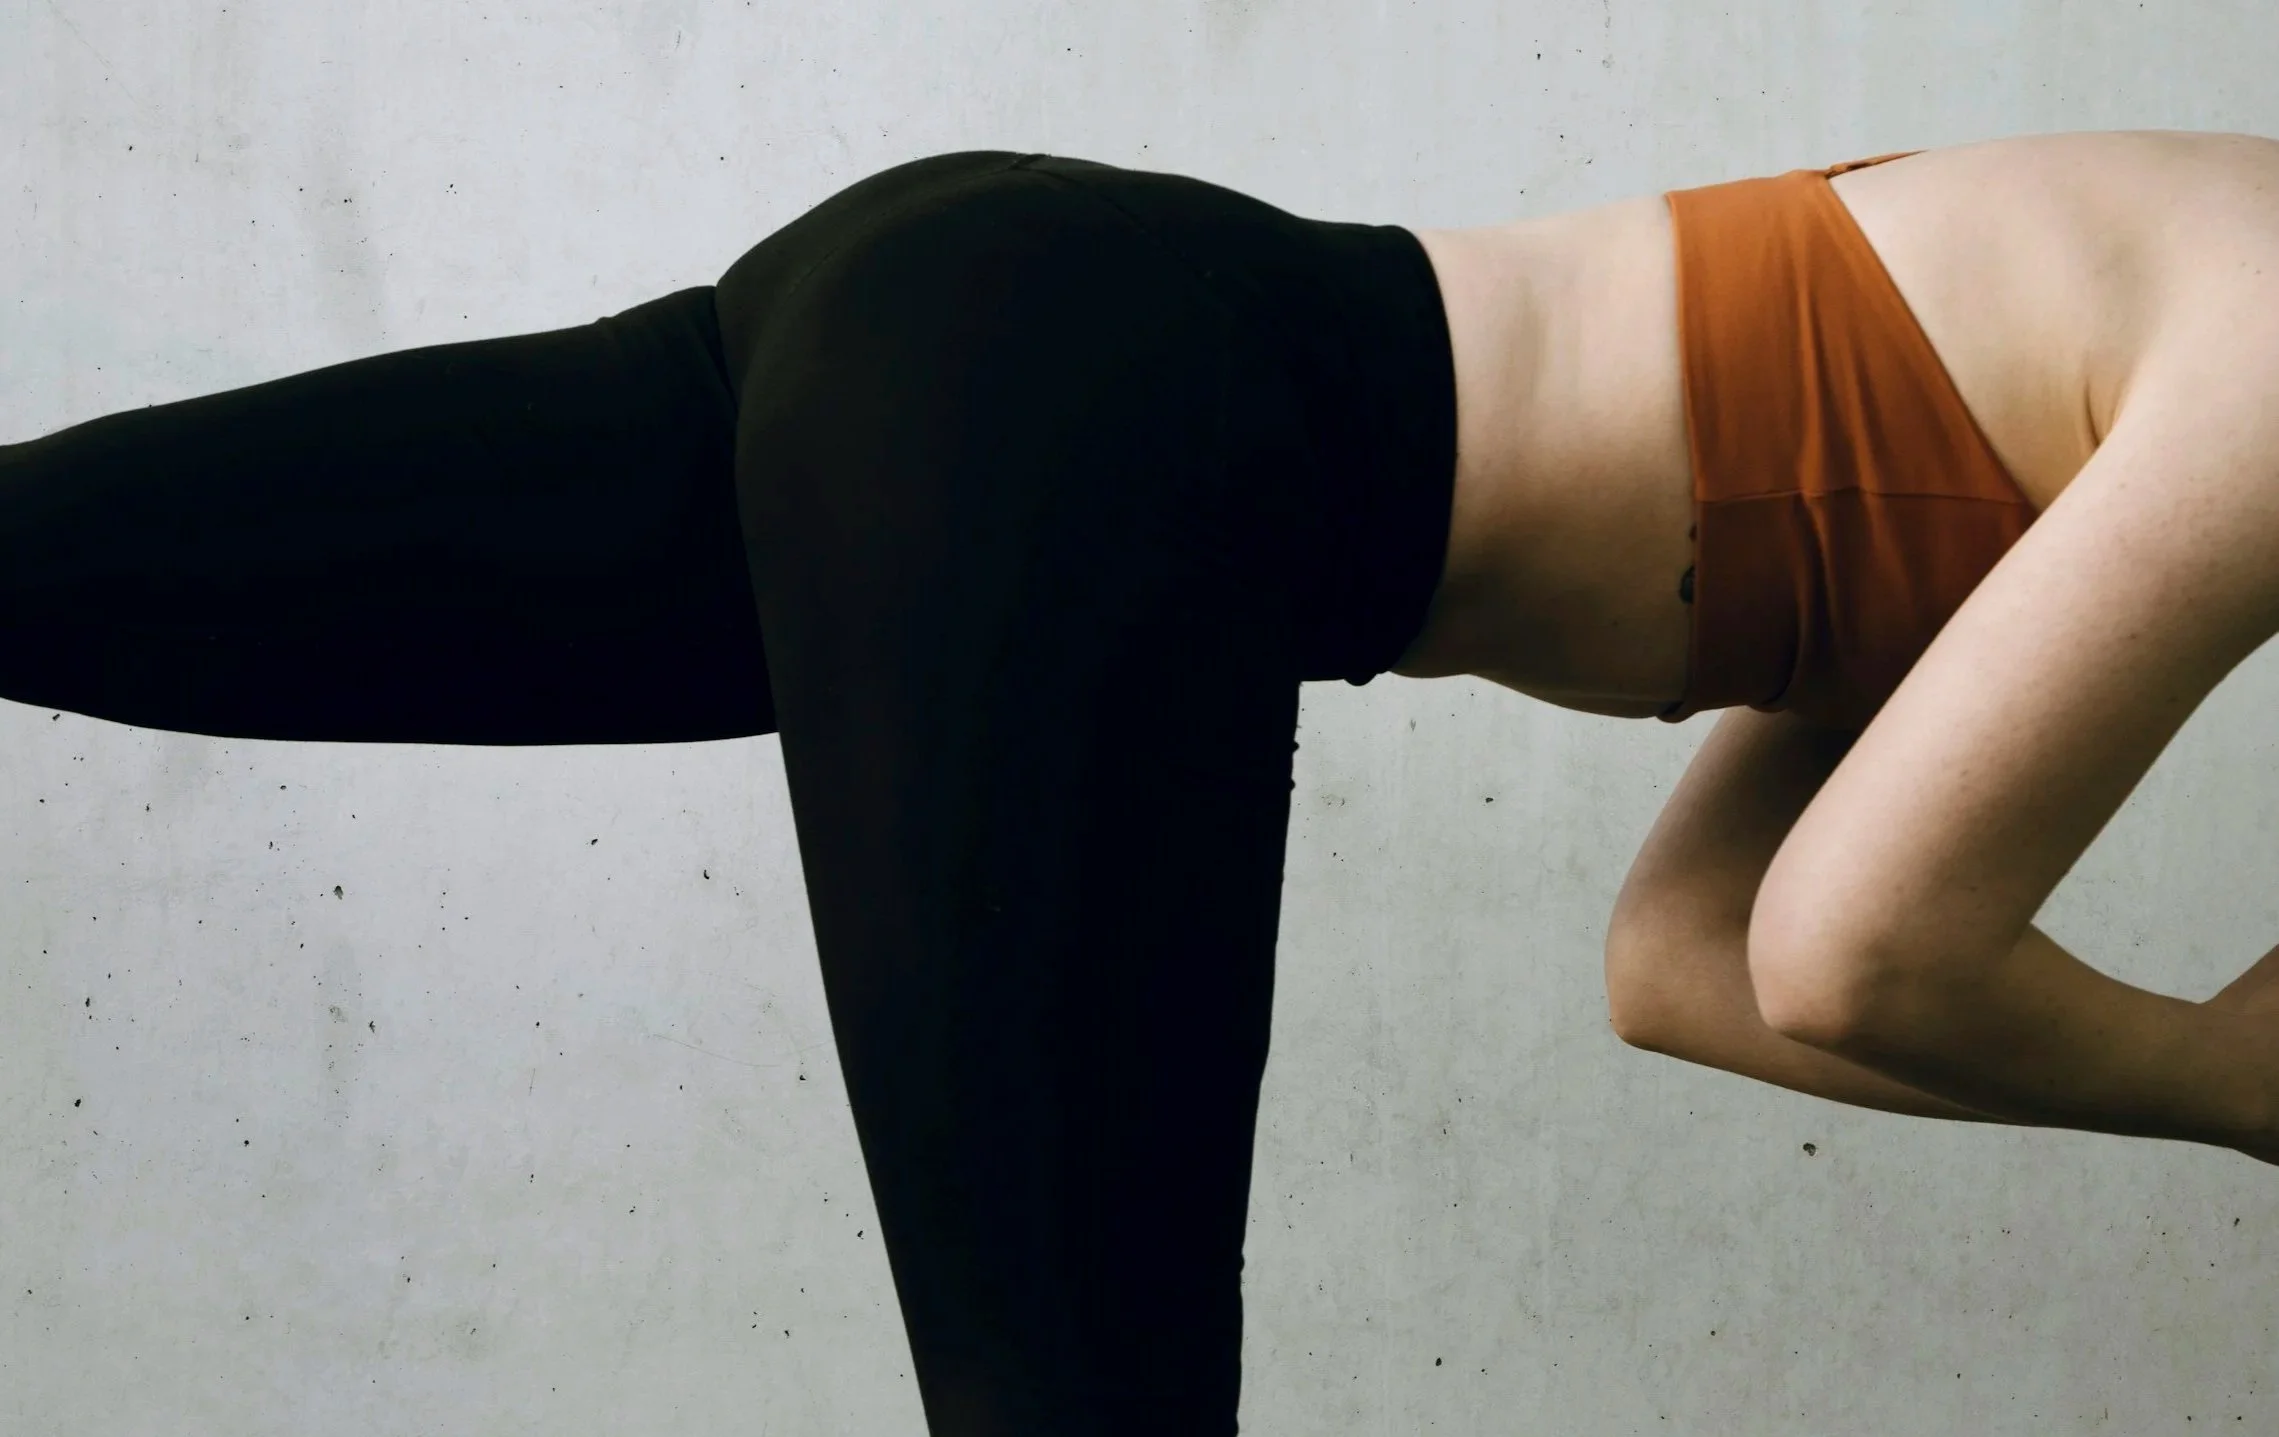
Side Stretch

Aim: Stretch your Glutes, which improves hip flexibility.
Lie down on your side, face up.
Get your feet flat on the floor.
Raise the affected leg and place your foot on the outside surface of the opposite knee.
Using the hand on the opposite side, push the affected side's knee straight inwards.
Hold for 10-20 seconds, repeat for 2-3 times.
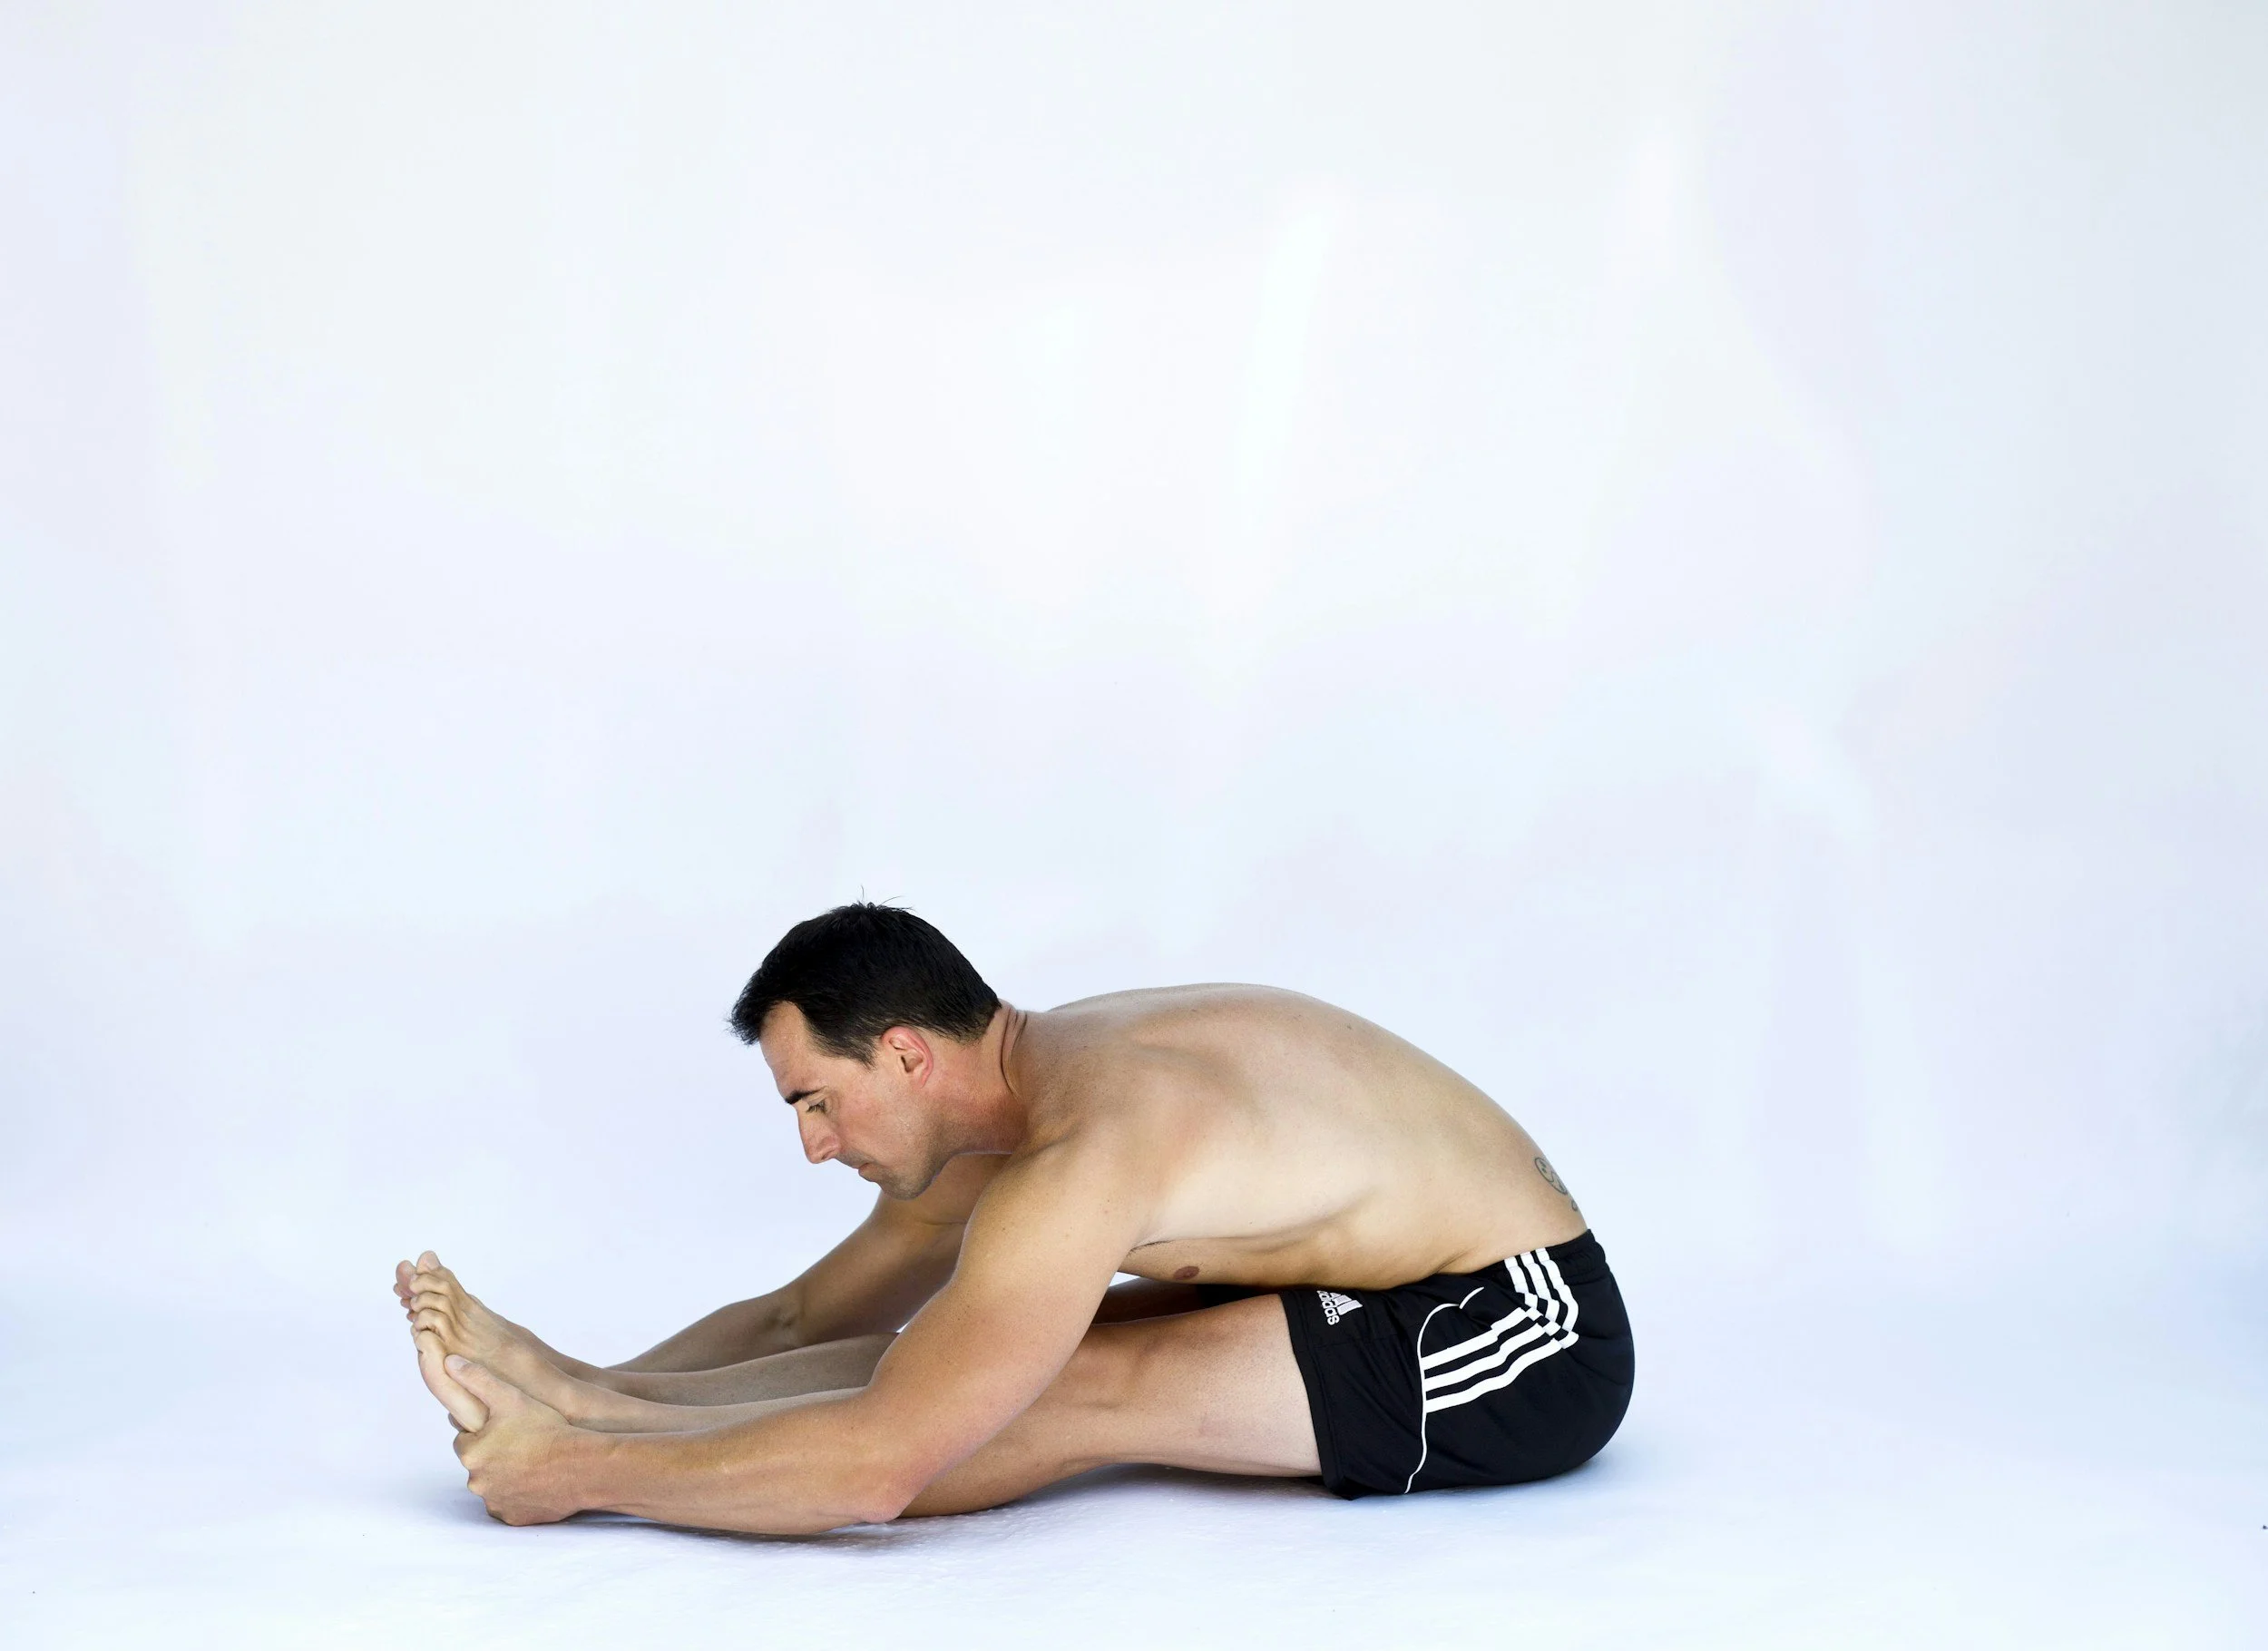
Hamstring Stretch
Aim: To stretch your Hamstrings, which improves overall hip joint flexibility.
Sit down on the floor, with both legs stretched out in front.
Lean forward as much as you can and reach for your heels or toes.
Hold the position for 10-20 seconds, 2-3 times.
Quad Stretch
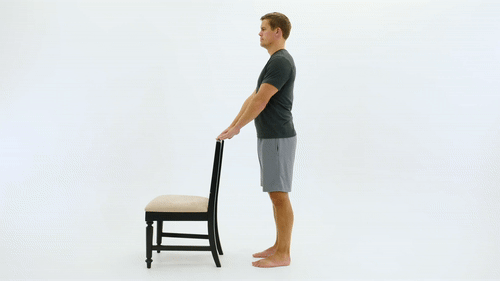
Aim: Improve flexibility in your Quads and Glutes.
Stand up tall, just behind a chair.
Bend the affected leg and hold the foot at the back.
Apply a gentle backward pull, until you feel a gentle stretch along your thigh and front part of the hip.
Hold the position, 10-20 seconds, 2-3 times.
Lunge
Aim

Build strength in your Glutes, quads.
Improve general dynamic balance and flexibility.
How to do it
Stand tall, feet at shoulder width apart.
Take a long step forward with your right foot.
On impact, lower your whole body while bending the rear leg towards the floor.
Return to the starting position.
Repeat the sequence on the other side.
Aim for 10-12 reps on each side, 3-4 sets.
Squats

Aim
Build strength in your glutes and quads.
Improve balance and overall lower body strength.
How to do it
Stand up tall, feet at shoulder width.
With control, lower your body down until your thighs are parallel to the floor. Your knees should be bent at 90 degrees at this point.
Return to the starting position.
Repeat the movement 10-12 times, 3-4 sets.
All these moves can be progressed to more advanced weighted versions. However, it's always great to work with your therapist or personal trainer to figure out the right exercise intensities and volumes.
Book Now
Safe recovery after a hip replacement shouldn't be a lonely ordeal. Proper professional guidance is imperative for optimal recovery. Reach out to our Physiotherapists here and get started today.
Read More Related Articles