High Ankle Sprains: Causes, Treatment, Best Exercises for Recovery
Sustaining a high ankle sprain can be frustrating. One moment, you're bustling with energy and positivity, and another, you can't even put weight on your foot after that one fatal twist. Before realising it, you're questioning the decision to stay active or put in that extra effort in training. For some, it may be mistaken for a regular ankle sprain until the persistent pain and extra symptoms indicate something more sinister lurking underneath. High ankle sprains are surprisingly common, with studies indicating that they constitute up to 11% of all injuries. The good news is that like all sprains, high ankle sprains are highly treatable.
Whether the injury is initially managed conservatively or surgically, exercises are a huge part of recovery. The idea is to promote healing, reduce adverse symptoms, optimize movement, and enhance general physical function. This article will look at everything you need to know about high ankle sprains, and some of the key exercises you can use to maximize recovery. Let's get started.
What's a High Ankle Sprain?
High Ankle Sprains involve injuries to one or more ligaments connecting the lower parts of the Shinbone and its smaller brother, the fibula. Together, the two bones form a bony socket at the bottom, known as the ankle mortise. This articulates with a foot bone known as the Talus to form what we call the ankle joint.
This makes the joint between the Fibula and Tibia crucial to the ankle joint's stability, which is why it's supported by a series of tough ligaments at the front and back sides of the joint.
The front portion of the joint is held together by the AITFL(Anterior Tibiofibular Ligament). The back portion is held together by a broader ligament known as PITFL(Posterior Inferior Tibiofibular Ligament). Up top, the two bones are held together by another tough connective tissue, known as the Interosseous membrane.
So what typically causes High Ankle Sprains?
Like all sprains, high ankle sprains are a result of excessive loading of the ligaments that support this joint. Distractive forces between the fibula and tibia are a major culprit here, often due to extreme twisting(rotation) and dorsiflexion(bending) of the foot. This explains the injury's high prevalence in high-impact sports like American football and soccer, which involve intense loading and rapid movements of the ankle joint. In fact, studies indicate that the injury affects up to 29% of American Footbal players.
What it Looks Like: Signs and Symptoms
Swelling: predominantly on the outside of the ankle joint.
Discoloration of the skin due to leakage of blood.
Inability to bear weight on the affected foot.
Ankle instability(in significant or complete tears).
Treatment overview
Treatment can be conservative/non-invasive or surgical depending on the extent of injury. High ankle strains without distraction of the joint typically need a period of immobilization in a cast/walking boot for 4-6 weeks. This allows protection while facilitating healing in an optimal bony alignment. A period of rehab follows, to restore flexibility, strength and general physical function. Physiotherapy plays a crucial role during this period.
High Ankle Sprains with significant joint distraction require surgery and a postoperative rehabilitation process that spans a period of 4-6 weeks. Again, a qualified physiotherapist should take you through all the required stages to get you back on your feet and optimize physical function. Reach out to one of our qualified physiotherapists if you’re looking to get expert guidance through your recovery process.
Best Exercises for High Ankle Sprain Recovery
The moves below are a great opportunity for you to build on the exercise program prescribed by your physiotherapist in the later stages of recovery. Stretches help with optimizing ankle joint flexibility while strength training exercises build strength, balance and enhance movement efficiency. Let's get started:
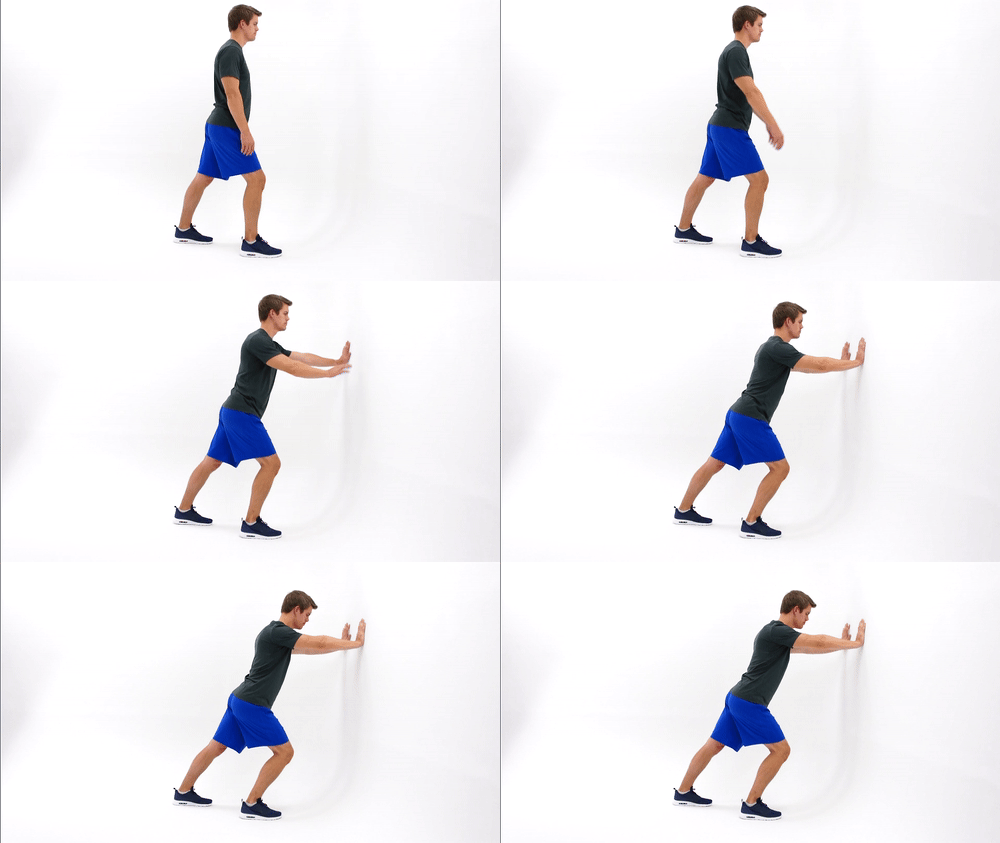
Calf Stretch
Aim:
Improve/preserve ankle joint flexibility by enhancing dorsiflexion(upward bending of the foot).
Reduce/prevent tightness in the Calf muscles.
How to do it
Stand up tall facing a wall, at about a step's length away.
Lean on the wall, using both arms.
Take a step back with the affected foot.
Lunge forward on the unaffected leg until you feel a moderate stretch in the calf area.
Hold for 15-30 seconds.
Return to the starting position, repeat 3-4 times.
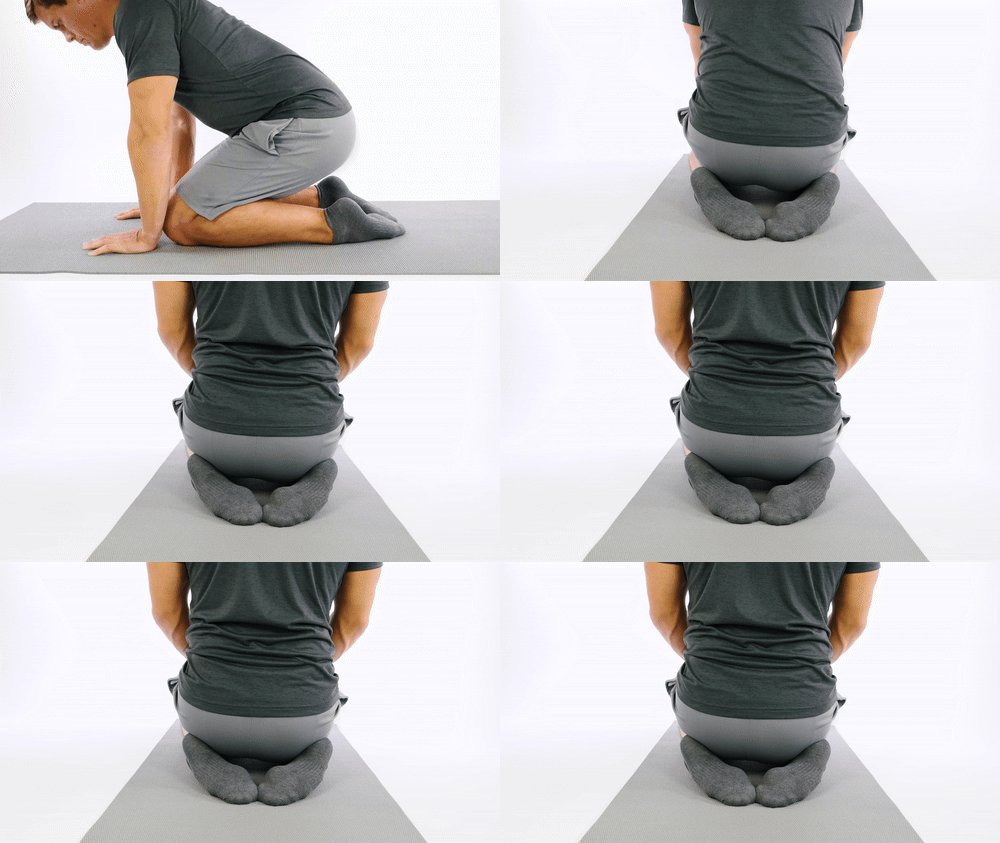
Seated Stretch
Aim:
Improve/preserve ankle joint flexibility by enhancing plantarflexion(downward bending of the foot)
Prevent/reduce tightness in dorsiflexors of the foot.
How to do it
Start by kneeling down on an exercise mat or any soft platform.
Sit back on your heels
Hold for 15-30 seconds.
Repeat 3-4 times.
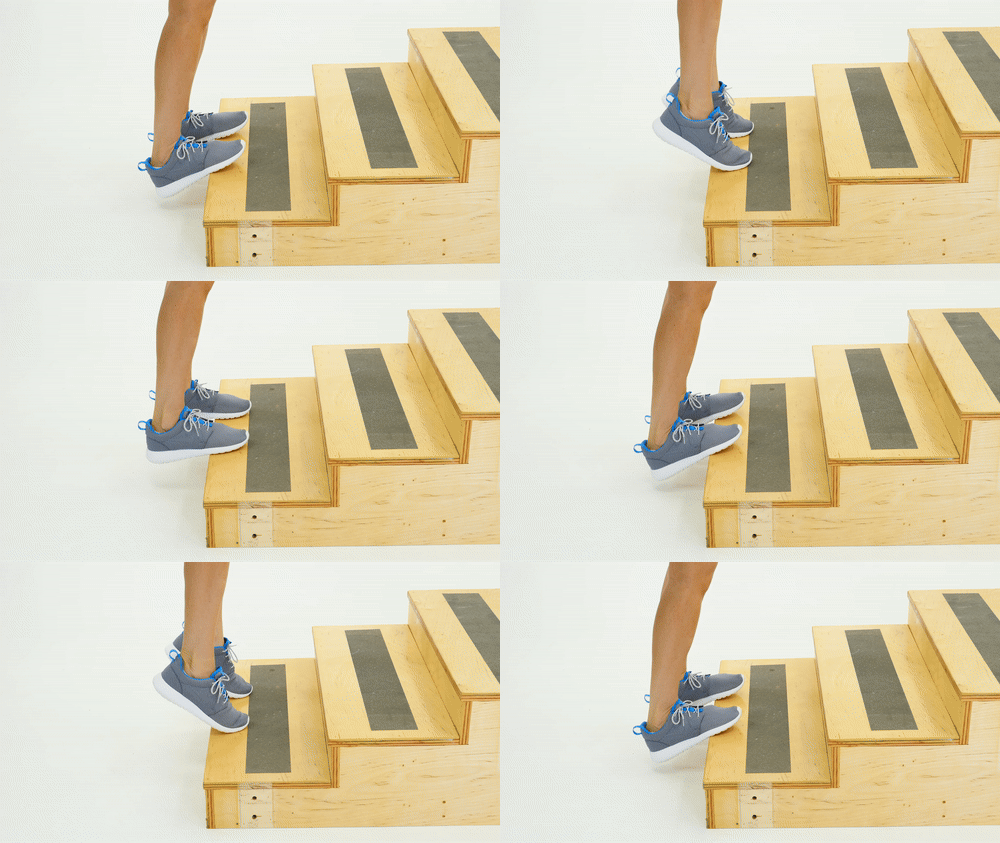
Heel Raises
Aim:
Build Calf muscle strength, especially the largest calf muscle: Gastrocnemius.
How to do it
Find a stable, raised platform i.e aerobic step, any standard step.
Stand up tall, with both heels over the edge of the step.
Raise your heels, pushing the whole body straight up.
Hold the top position for 1-2 seconds.
With control, return to the starting position.
Repeat the movement for another rep, aim for 10-15 reps, 3-4 sets.
Progression:
Hold a Dumbbell in each hand to increase the total weight.
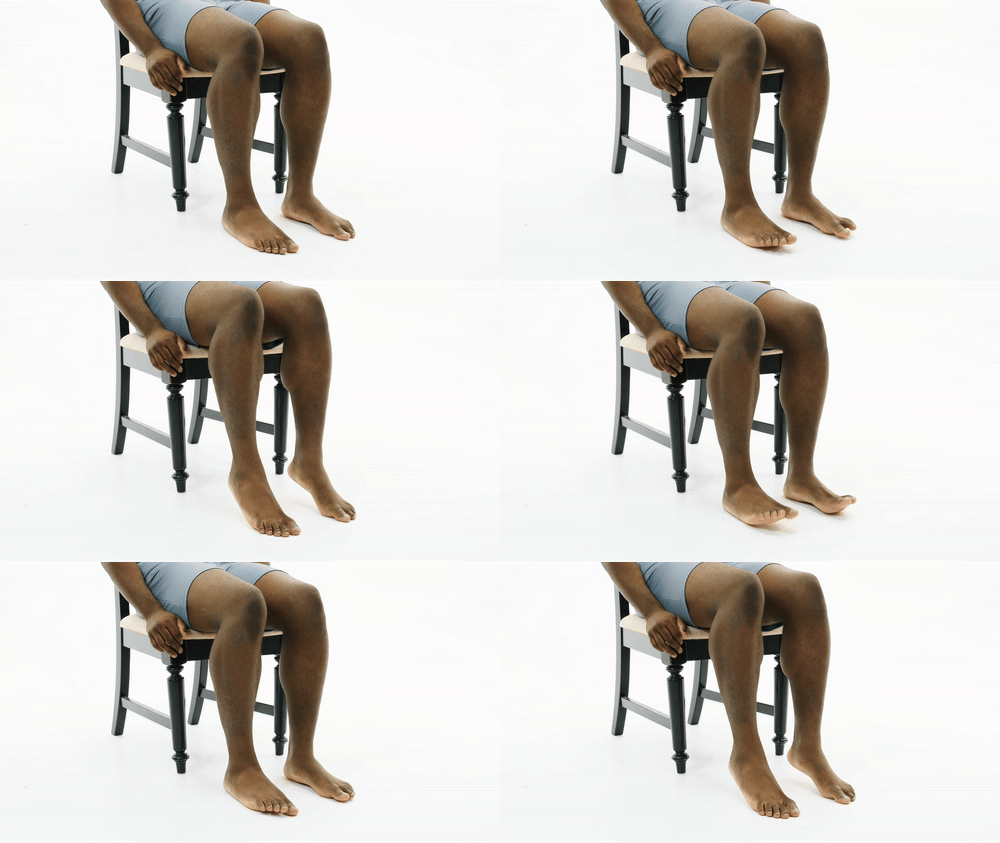
Seated Toe and Heel Raise
Aim: Build/preserve Calf muscle strength, especially the smaller calf muscle known as Soleus.
How to do it
Sit down on a bench or chair, both feet flat on the floor.
Raise your heels, hold the top position for 1-2 seconds.
With control, return to the starting position.
Repeat the movement for another rep, aim for 10-15 reps, 3-4 sets.
Progression:
-Place dumbbells on your thighs to up the challenge.
Inversion and Eversion Exercise
Aim:
Improve/preserve eversion and inversion of the foot.
How to do it
Sit on a bench or chair, with the affected leg crossed over and rested on the opposite thigh.
Twist your forefoot upwards and downwards simultaneously.
Aim for 15-30 reps each side, 3-4 sets.
Progression:
Use a resistance band(if available) to upgrade the challenge:
Loop the elastic exercise band around the unaffected forefoot. Secure the other end under the other foot.
Make sure the band is taut enough to offer moderate to strong resistance.
Book Now
Conclusion
Pay attention to your body's response during these exercises. It's best to eliminate any moves which cause significant pain in and around the affected area. Again, it's always prudent to work with your physiotherapist to ensure safety and efficacy. Looking for expert guidance through your recovery journey? Reach out to us through the form below or simply call us through the contact details on the top left corner.


